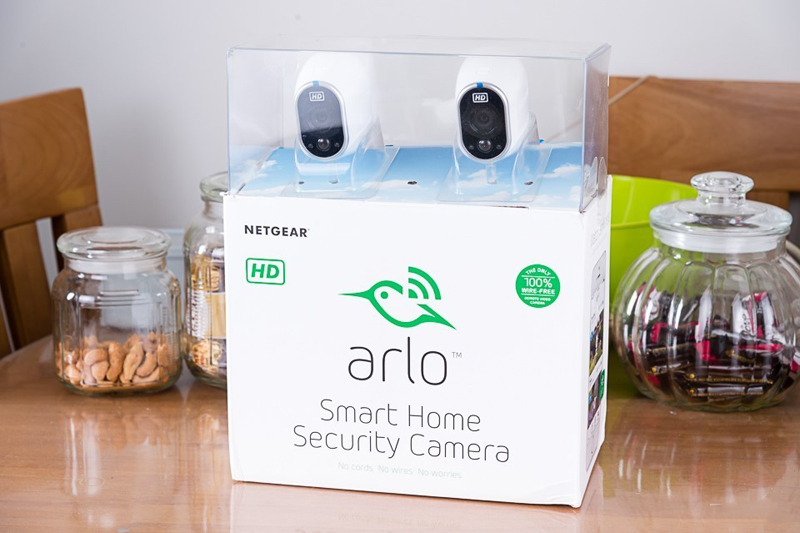
Disassemble/teardown Netgear Arlo Smart Wireless WiFI cameras security system
Compare the Bluetooth Low Energy (BLE) and ZigBee/Z-Wave smart home technologies, the power consumption of WiFi technology is much higher. Commonly it’s not a wise idea to use the batteries to provide the power supply to the WiFi security cameras. However, Netgear Arlo is a kind of wireless camera security system that including HD cameras are powered by CR123A Lithium batteries.
Unlike traditional WiFi cameras will require wired power cable to install, the Arlo security system uses batteries to work, therefore people can easily install and place the cameras anywhere, and as it leverages advanced WiFi technology, the WiFi signal coverage is range is much further than those competitors. Intending to extend the batteries' lasting time, Netgear Arlo leveraged many new groundbreaking designs to the product, so let’s disassemble this wireless security system step by step to unveil the mysteries.
Let’s start from its base station. By removing screws in the bottom, then insert the case opening tool to separate the plastic front panel from its back panel.
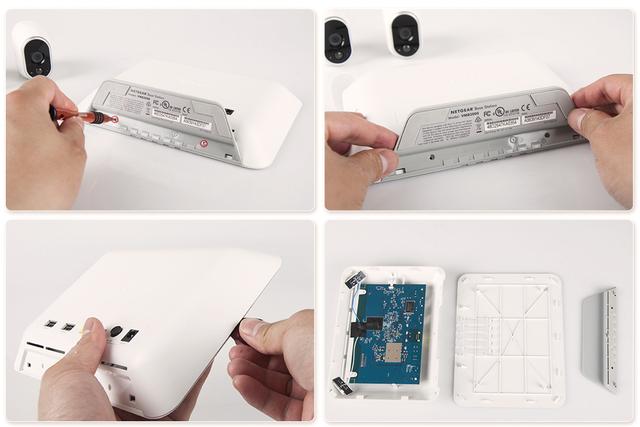
You’ll see the main board of the base station, and two antenna boards around the corner of the base station, disassemble the antenna by using a tweezers.
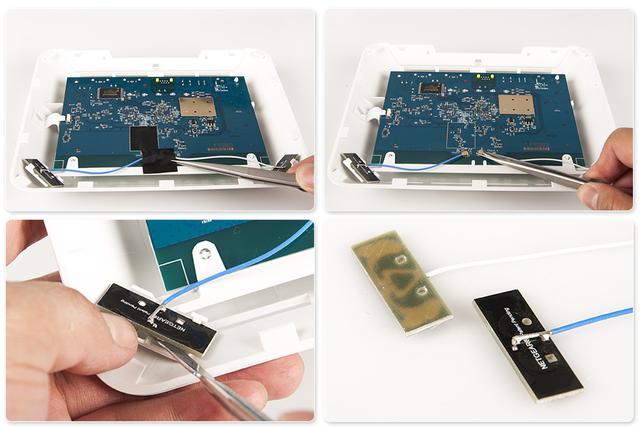
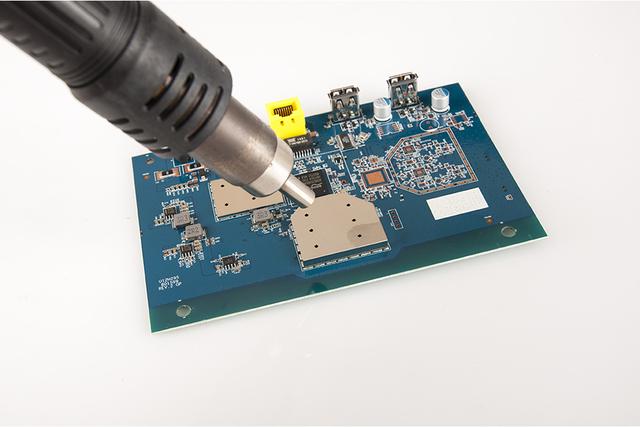
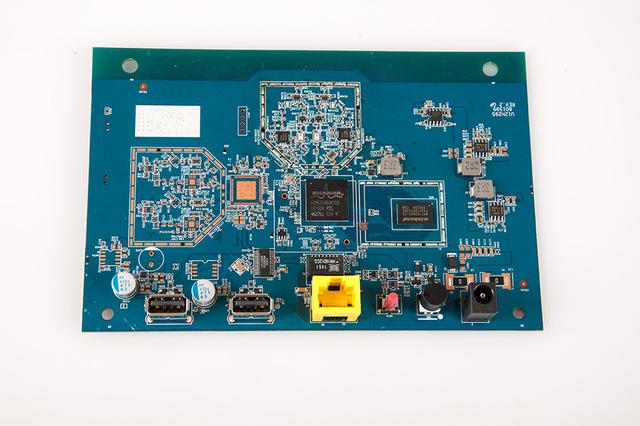
After all the antennas have been removed, you can slide the main board to pull it out from the plastic housing. There are several shielding layers on both sides of the main board which can avoid the components from being interfered.
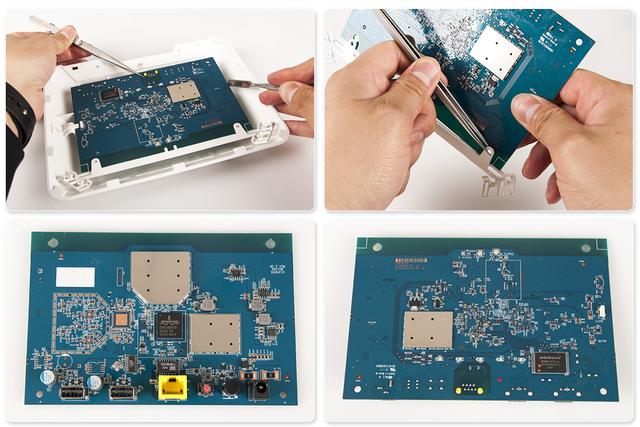
Removing them requires to use heat gun, a little risky to newbies. We don’t recommend users to try it.
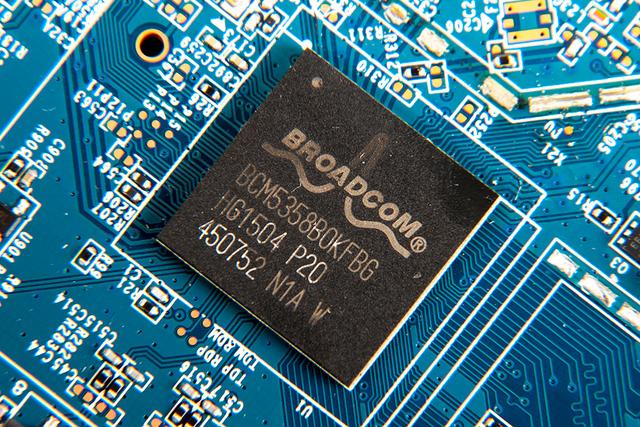
The main CPU processor adopts the Broadcom BCM5358BOKFBG, which supports dual band frequency (2.4GHz & 5GHz).
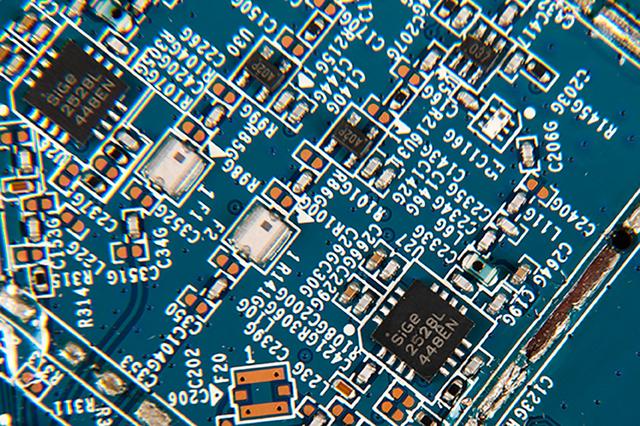
And the 2.4GHz circuit uses 2*2 structure design, each circuit has a SIGE 2528 signal amplifier to increase the signal strength of 2.4GHz.
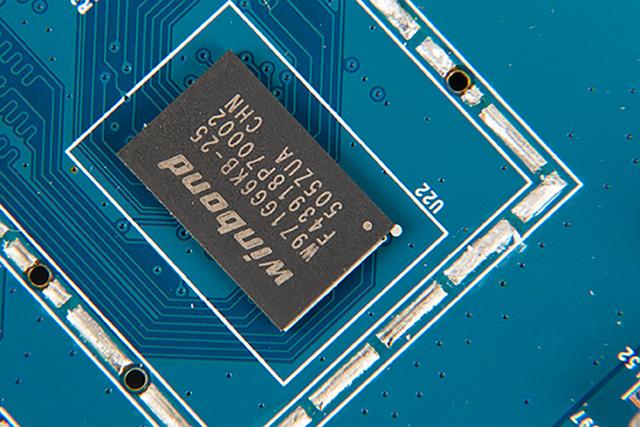
Winbond 128MB SDROM merely being utilized to transmit the Netgear Arlo’s data, which is arguable that the memory size is a bit large.
As the camera’s data is not very large, therefore comparing 5GHz, the 2.4GHz WiFi signal requires to have high wall penetration capability to maintain a stable connection for the data transmission from the Netgear Arlo cameras.
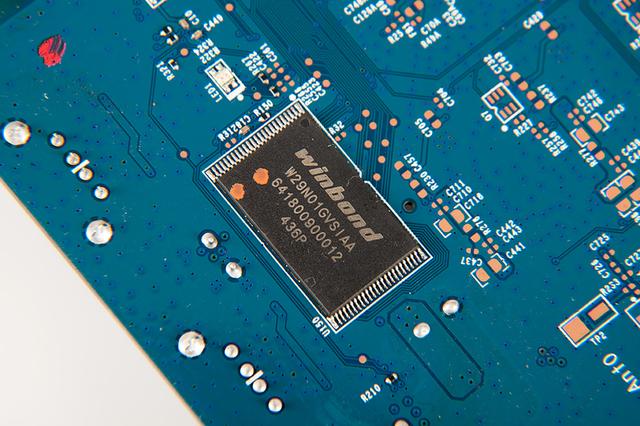
On the back of main board, there is a Winbond 128MB flash memory.
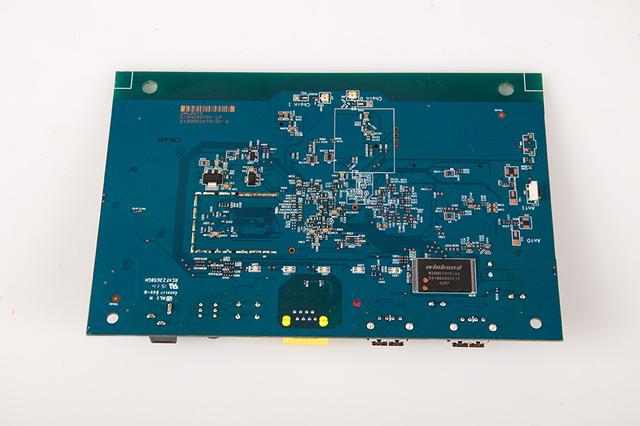
Here are the all components made up of the base station. Basically, it’s a Netgear V3400 router’s replica that has deleted 5G circuit and 4 LAN ports. This means other Netgear routers also can be used to your Arlo security cameras, this has been confirmed on the manual of R7000, which can become the base station to work with Arlo WiFi cameras through upgrading the firmware.
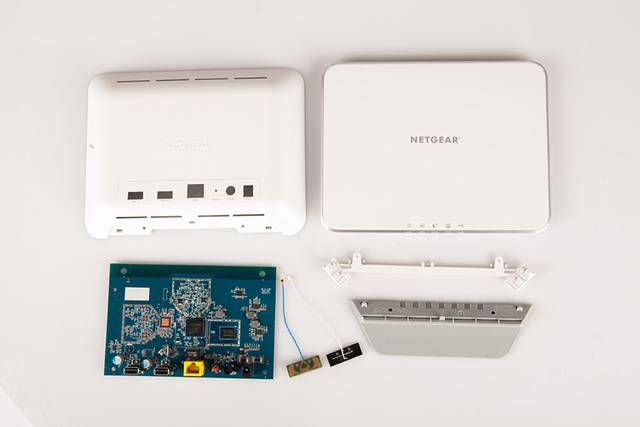
If you have already had a Netgear R7000 router or other higher end Netgear routers, we suggest merely purchasing 2 set of Netgear Arlo cameras to work with the router, it’s more economical, however this base station can provide more stable performance as it's only being used for data transmission from cameras.
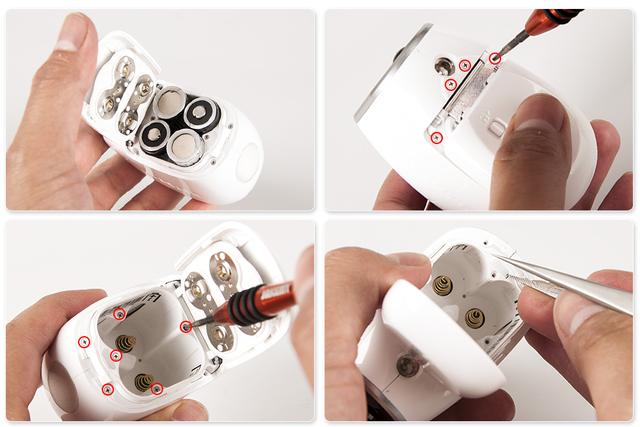
After we have successfully disassembled the base station, next we gonna disassemble the Netgear Arlo cameras, before doing it, removing the batteries and the screws, then you will find a hidden micro USB port.
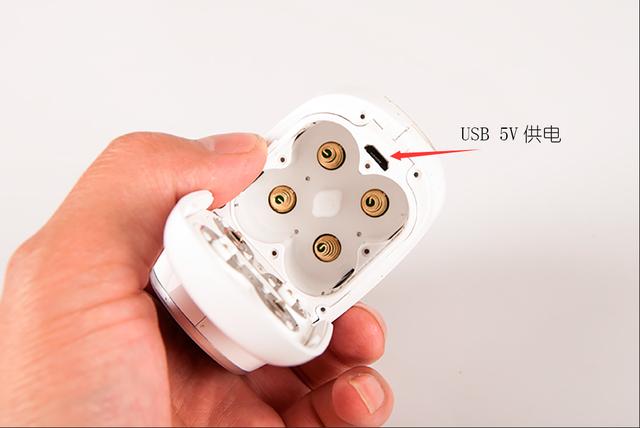
Using a USB cable to connect the camera to the computer, the computer can discover this new device, however it can’t automatically find the right driver. We reckon that this port not only can be used for recharging, but also can achieve data transmission.
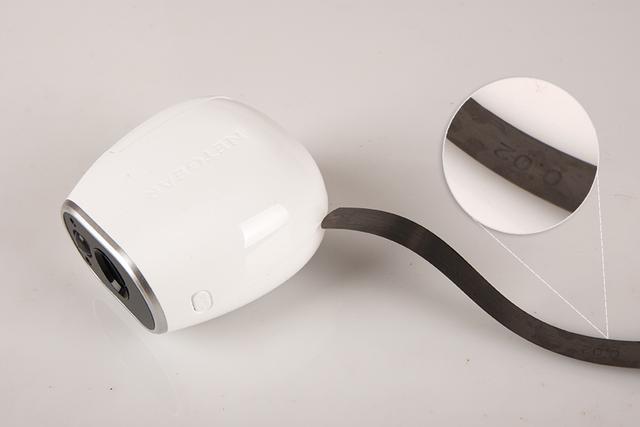
It takes almost 30 minutes to find the way to disassemble the camera, as this camera adopts IP65 waterproof design to resist the injection of dust and water.
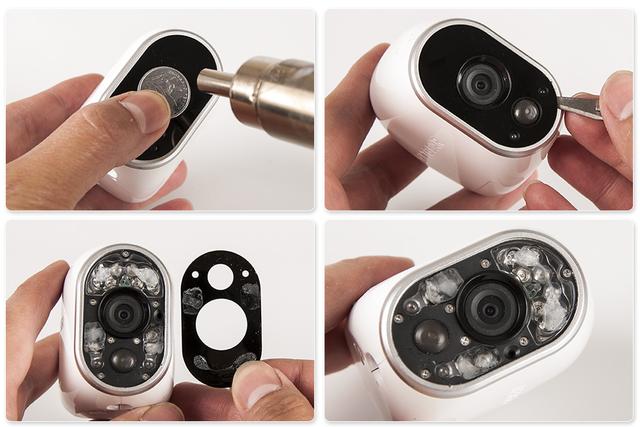
Based on my past experience, I think I should start from its front transparent cover. In order to protect the camera from being damaged, I use the hot air gun to heat the front glass, then trying to remove the plastic cover by a knife. Fortunately it turns out the front cover uses adhesive glue.
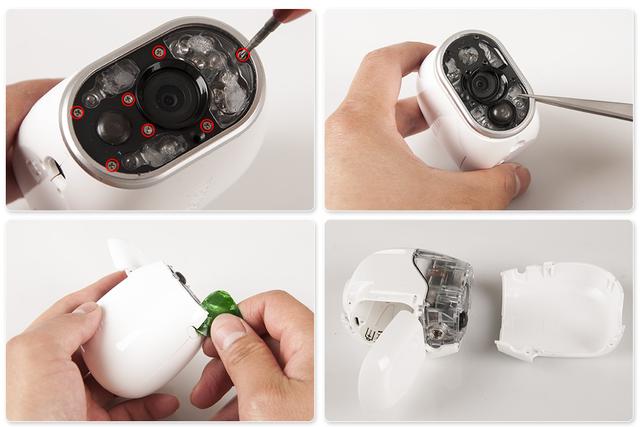
There are several screws around the each corner of the camera. Removing all 7 screws we can remove the camera’s front panel. Then we use the case opening tool to separate the front panel from the camera’s body.
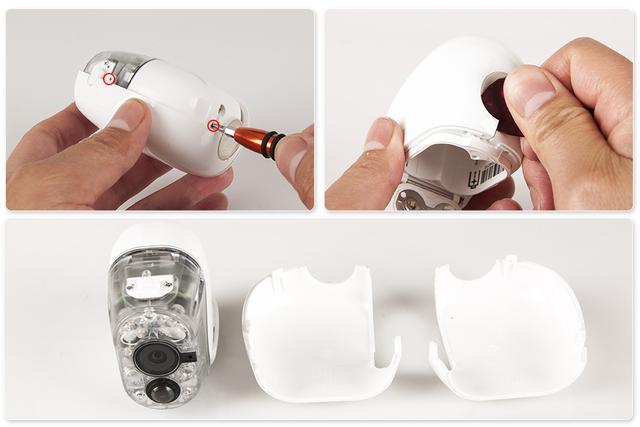
After done the above step, you will see the camera component is still protected by a transparent cover, this double protection design can enable the camera to truly achieve IP65 grade weatherproof protection, making the camera to be suitable in extreme weather condition.
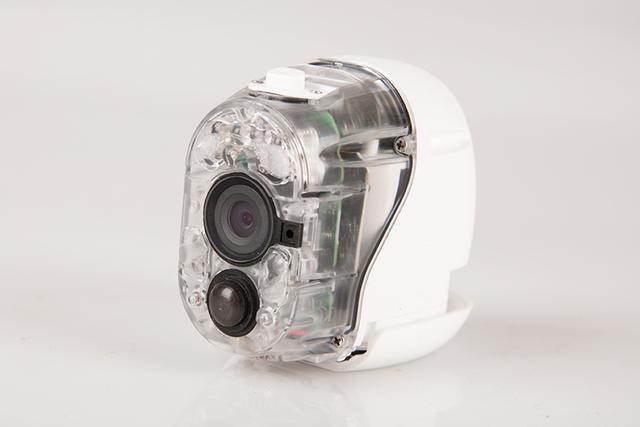
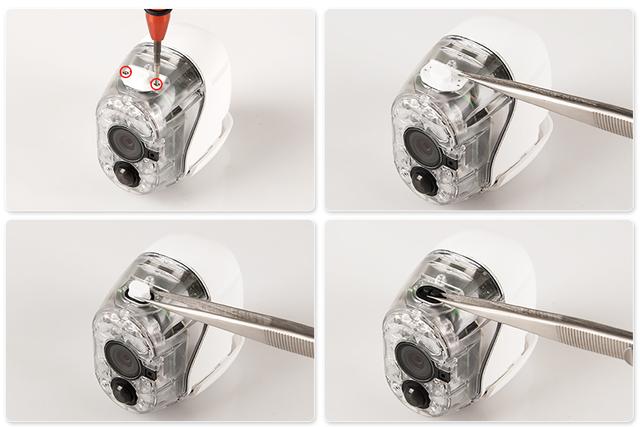
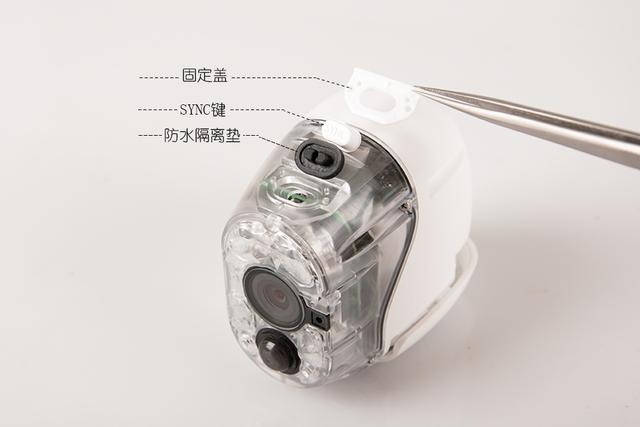
On the top of SYNC button, there are two screws and remove them you will see the part is isolated by a gasket.
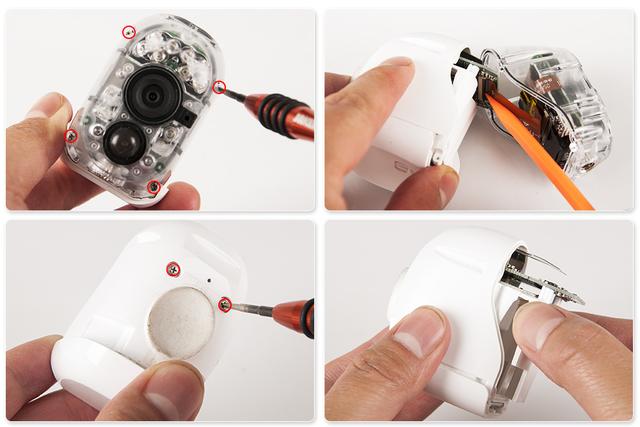
Proceed the disassembling, we will see the data connector, after remove another 2 screws we can plug out the camera’s board.
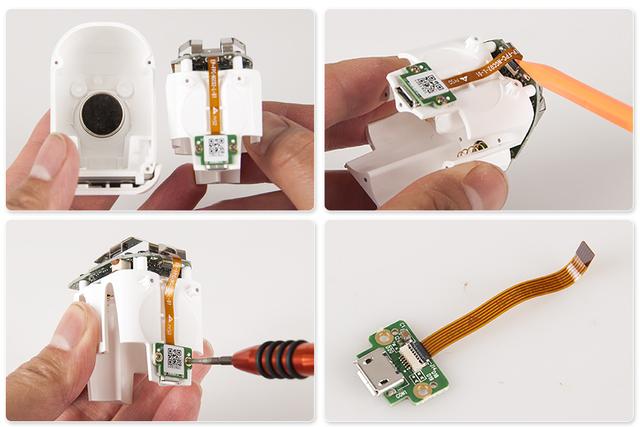
There is a strong magnet in the bottom, that’s the reason why the camera can adhere to metal surface objects.
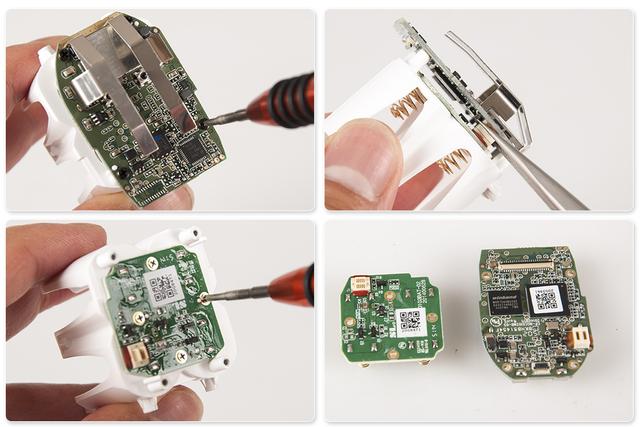
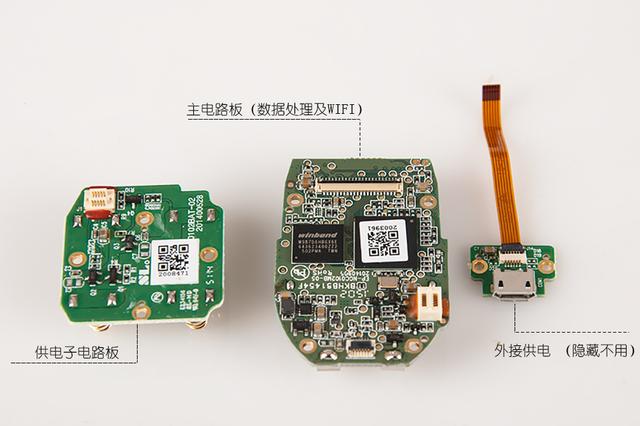
The camera’s board adopts dual layers design which can greatly save the space, unscrew other black screws, and don’t be in a hurry to plug out the board, since there is a connection cable between the power board and the main board.
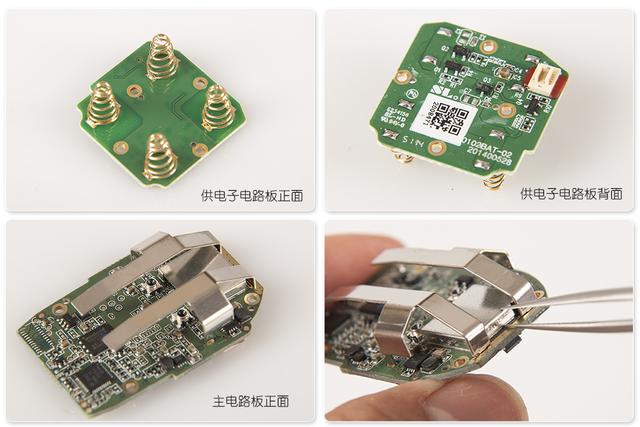
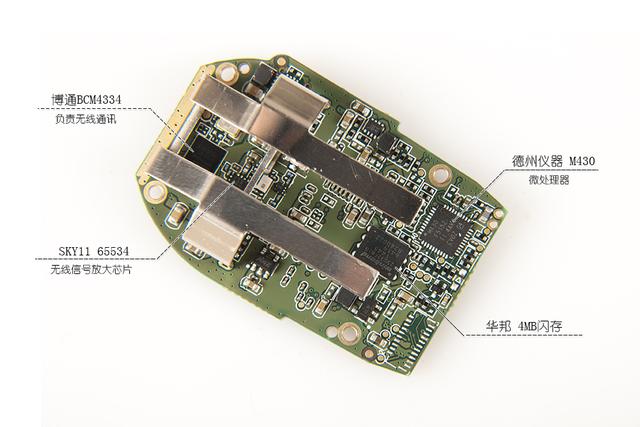
We can find two antennas design on the board of camera, WiFi chips are hidden by the metal shielding layer.
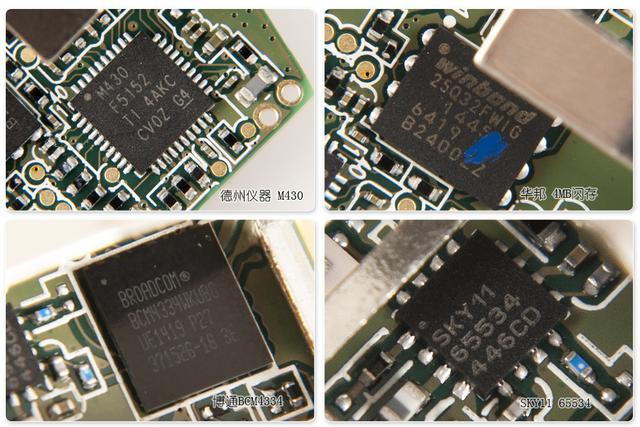
Now we can see Taxas Instruments M430 MCU, Winbond 4MB flash memory, WiFi parts employ Broadcom BCM4334 chip, this chip belongs to IEEE 802.11n product portfolio, supports 2.4GHz/5GHz dual band, WiFi adopts 2*2 design, has SKY11 65534 signal amplifier.
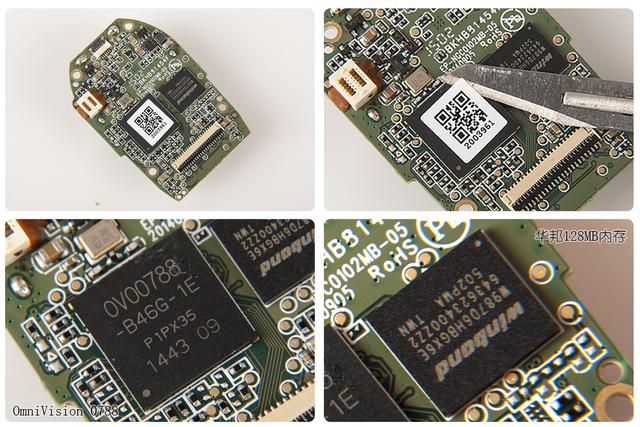
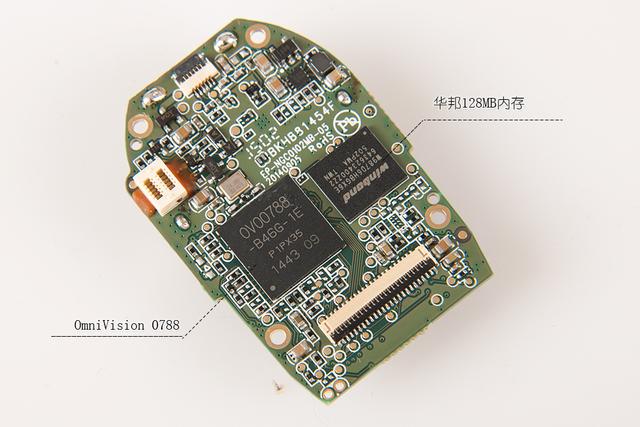
Arlo camera uses the OmniVision OV00788 as the camera’s image signal processor, next to it you can find a Winbond 128MB SDROM chip.
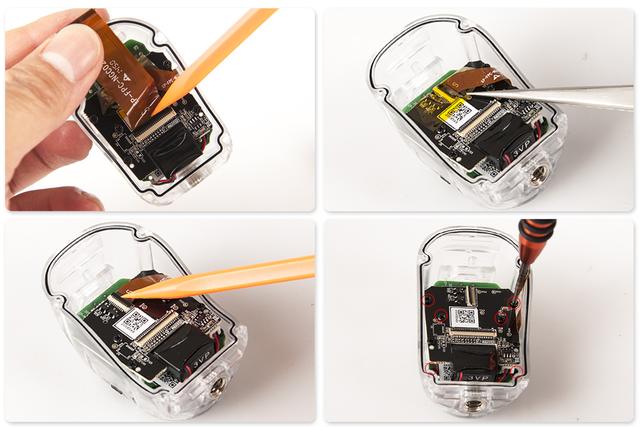
Continue the teardown, after separate the connection cable and remove additional 6 screws, among them two screws used to fix the camera’s lens.
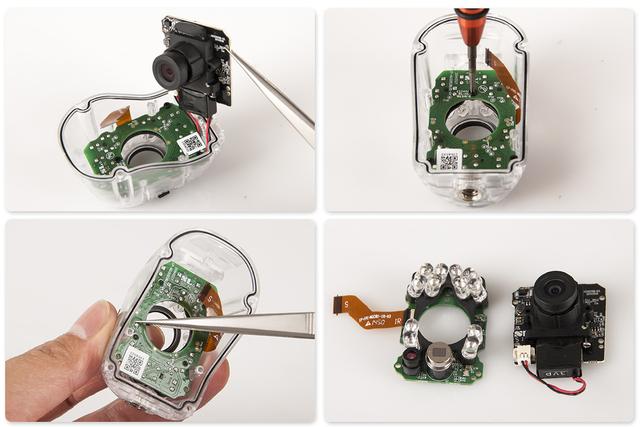
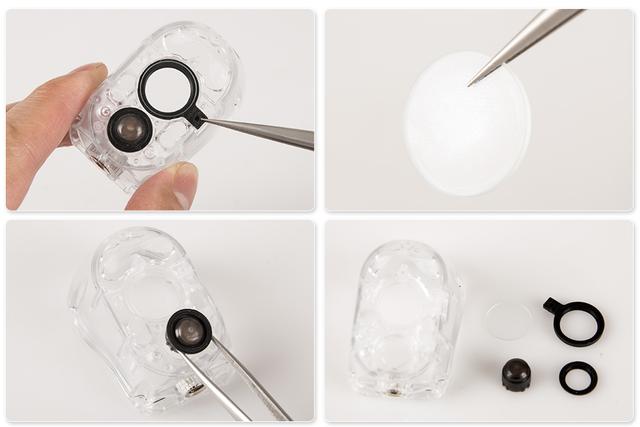
Now you will see two boards, one is Infrared illuminators + PIR board, and another is CMOS image sensor module. Glass coating technique has been used to the front glass intending to improve the light transmittance, there is a fresnel lens in front of the PIR sensor which designed for human motion detection.
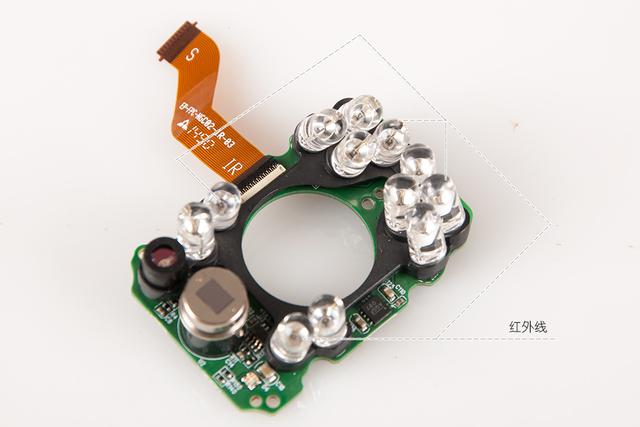
There are total 12 pieces Infrared LEDs to be used for night vision, and the night vision range can be 5 – 10 meters.
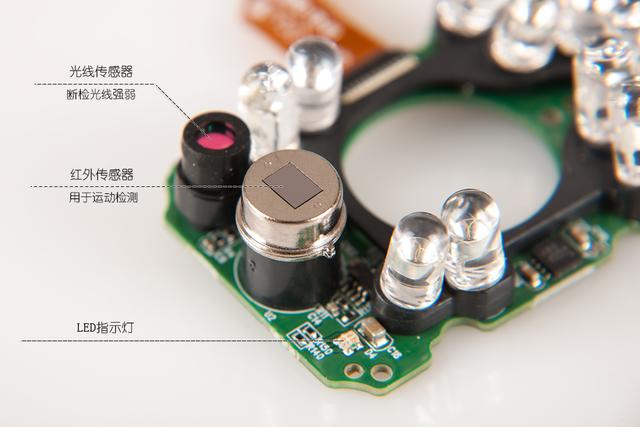
Similar to other IP cameras, the camera module has a IR-CUT filter located between the lens and CMOS image sensor. The CMOS image sensor is also from OmniVision, the model is OV9712, it’s a 1.0 megapixel progressive scan CMOS image sensor comes with 1280x720@30fps video capturing capability.
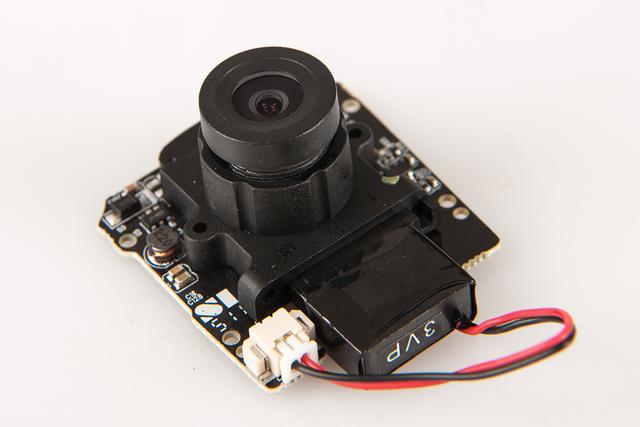
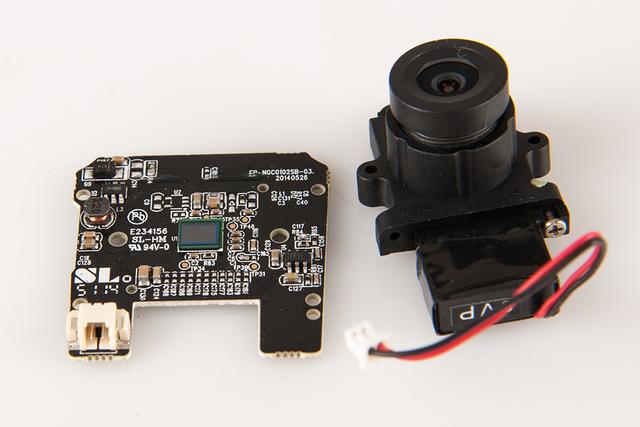
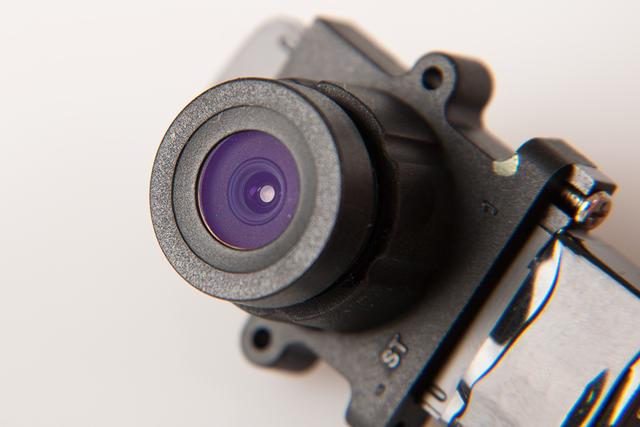
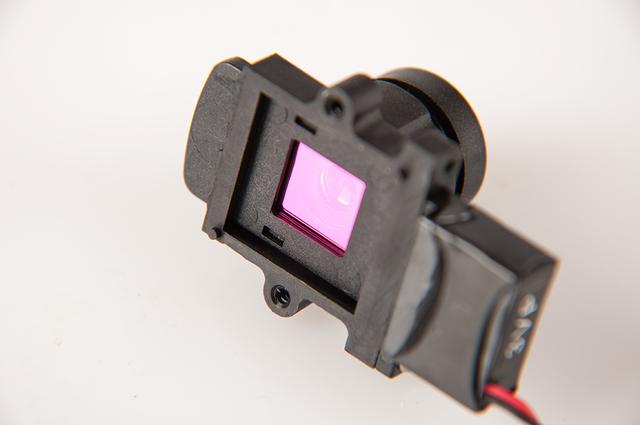
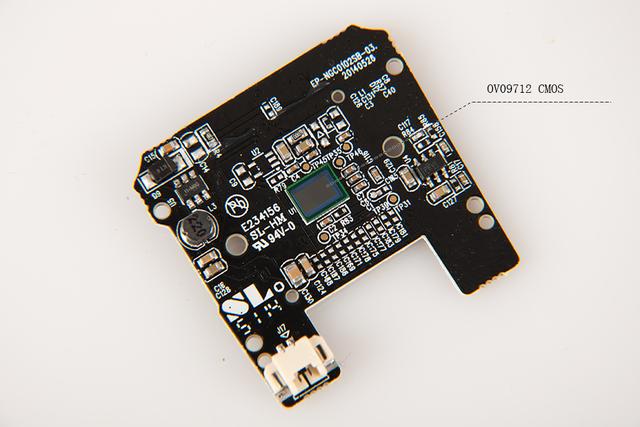
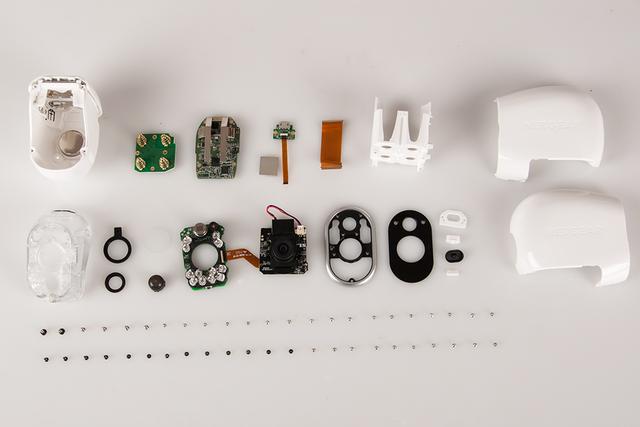
Here are all the components of the Arlo camera. Additionally, we herein provide you a function block diagram to explain how the Arlo camera works.
Get My Latest Posts
Subscribe to get the latest updates.
Your email address will never be shared with any 3rd parties.