Tutorial: How to config security IP camera?
Simple guide to teach you how to config a new IP camera. It's suitable for IP cameras based on Hisilicon and Davinci SoC solutions. Some network knowledge is required to follow/understand this tutorial.
1# IP Camera Connection
IP camera requires both power and data connection. According to different types of IP camera, you need to use different connection methods.
- Regular connection: IP camera comes with one power cable and one Ethernet RJ45 port. The power cable connects to DC 12V power supply (or AC/DC adapter), while using an Ethernet cable (Cat5, Cat6) connect it to your home router or network switch.
- PoE connection: IP camera supports PoE function, using a single Ethernet cable connect camera to PoE switch or NVR (with PoE ports).
- WiFi connection: IP camera merely connects to nearest power supply.
After complete the connection, you should see the RJ45 status LEDs are flashing, Blinking green and yellow means the IP camera connects to network successfully, can receive and transmit data.
2# Login/Access IP camera
In order to config the IP camera, you need to access its web interface/server. Majority of IP cameras only support Internet Explorer, because they reply on ActiveX plugin to run some specific remote control function. If your camera can support cross platforms such as Google Chrome, Firefox, Spartan browsers, then you also can use them to access IP camera.
Run your Internet Explorer, then visit the default IP address of your IP camera. You will be able to access the IP camera's web interface. Please note that different IP cameras have different default IP address. Below we summarized some default IP addresses for different IP cameras.
| Solution | IP Address | Admin Account | SoC | Brand |
|---|---|---|---|---|
| Hisilicon | http://192.168.1.20 | Account: Admin Password: (Empty) | Hi3518C, Hi3516C | Unifore |
| Davinci | http://192.168.1.20 | Account: 888888 Password: 888888 | DM365, DM368 | Unifore |
| Ambarrella | http://192.0.0.64 | Account: admin Password: 12345 | A5, A7, A9 | Hikvision |
* Visit camera's default IP address
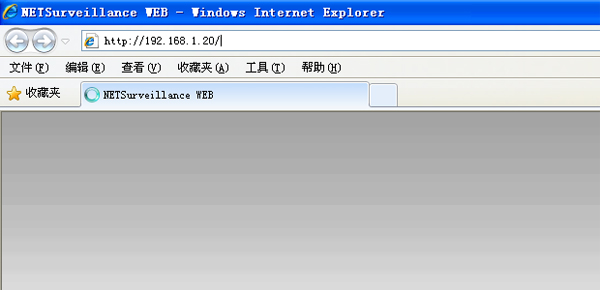
▲ Access IP camera's web server via Internet Explorer ▲
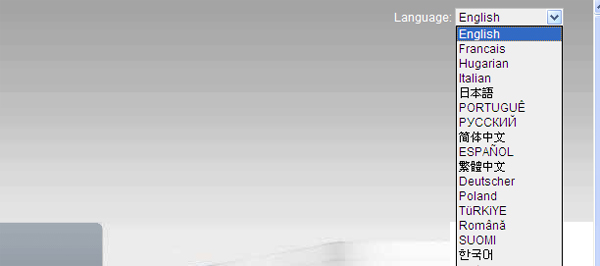
▲ Choosing your local language ▲
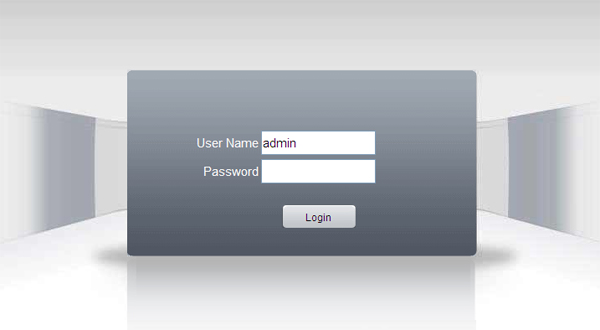
▲ Login with default account ▲
* Install the ActiveX plugin
For the first accessing, ActiveX plugin should be installed in your Internet Explorer browser. Typically, when you firstly visit the webpage, it will require you to install it. If you failed to install it, the webpage can't load properly. Click here to know how to install ActiveX plugin for IP camera/NVR.
* Forget IP camera password
If you forget the camera's password, you can't login web interface. Some cameras have reset button, you can press "RESET" button to reset camera to factory status. Therefore, you can use default password to login.
3# Change default IP address of IP camera
Each of IP devices should have an unique IP address. For example, you bought four IP cameras, then you only can keep one camera with default IP, the rest of IP cameras need to change IP. This can allow all four IP cameras connect into network without encountering IP address conflict issue.
* For Hisilicon based IP camera, you can follow below instructions to change default IP address.
▲ Hisilicon IP camera Web Interface ▲
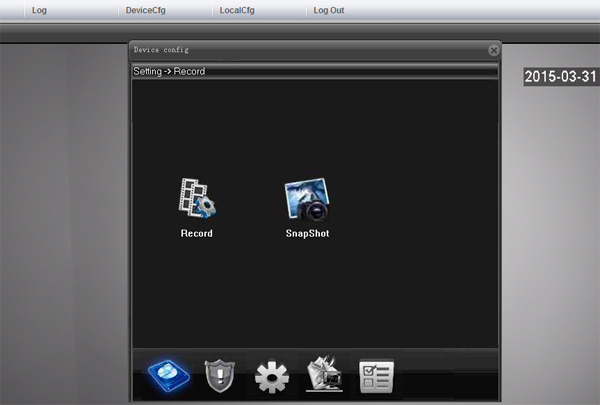
▲ Go to [Device Cfg] > [Setting] ▲
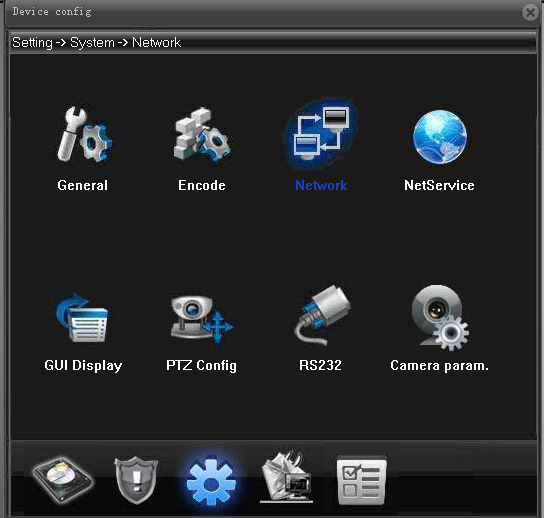
▲ Go to [Device Cfg] > [Setting] > [Network] ▲
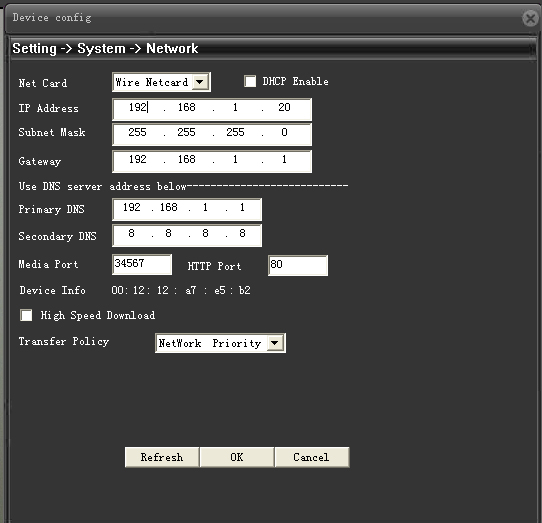
▲ Changing the default IP and Gateway, DNS information ▲
4# Connect IP camera to NVR
* Onvif connection
Although IP camera supports standalone working, you may also wanna connect it to network video recorder. In today's digital video surveillance field, Onvif is the universal standard/protocol. Once both of equipment are compliant with this protocol, they can discover each other without any additional configuration. Please bear in mind that if NVR need to discover the IP camera, the IP camera and NVR should connect to same router, also have same gateway (192.168.1.1), submask network settings.
* RTSP connection
Alternatively, you can use the RTSP protocol for the video streaming between NVR and IP camera. Real Time Streaming Protocol (RTSP) is used for establishing and controlling media sessions between end points. Currently, RTSP supports JPEG, JPEG2000, MPEG2, MPEG4, H.264 video compression.
RTSP information will be like this:
| Models | Connection Type | Example URL | Audio | Talk Model |
|---|---|---|---|---|
Hi3516 | FFMPEG | rtsp://192.168.0.xxx:554/user=admin&password=&channel=1&stream=0.sdp | yes | None |
Hi3518 | FFMPEG | rtsp://IPADDRESS//user=admin_password=tlJwpbo6_channel=1_stream=0.sdp | Yes | None |
Hi3518 | FFMPEG | rtsp://IPADDRESS:554//11 | Yes | None |
Hi3518 | VLC | rtsp://IPADDRESS:554/user=[USERNAME]&password=[PASSWORD]&channel=1&stream=0.sdp? | Yes | None |
Hikvision DS-2CD2012-I | FFMPEG | rtsp://IPADDRESS:554//Streaming/Channels/1 | Yes | None |
Hikvision DS-2CD2132 | FFMPEG | http://IPADDRESS/videostream.asf?user=[USERNAME]&pwd=[PASSWORD]&resolution=64&rate=0 | Yes | None |
Hi3507 | JPEG | http://IPADDRESS/cgi-bin/net_jpeg.cgi?ch=[CHANNEL] | No | None |
Hi3507 | VLC | rtsp://IPADDRESS:554/[CHANNEL] | Yes | None |
Hi3507 | VLC | rtsp://IPADDRESS:554/ch0_0.h264 | Yes | None |
HYV3804 | VLC | rtsp://IPADDRESS:554/ch0_0.h264 | Yes | None |
HYV3804 | VLC | rtsp://IPADDRESS:554/[CHANNEL] | Yes | None |
Other | FFMPEG | http://IPADDRESS/videostream.asf | Yes | None |
Other | FFMPEG | rtsp://IPADDRESS:554//11 | Yes | None |
Other | JPEG | http://IPADDRESS/cgi-bin/net_jpeg.cgi?ch=[CHANNEL] | No | None |
Other | VLC | rtsp://IPADDRESS:554/ch0_0.h264 | Yes | None |
Other | VLC | rtsp://IPADDRESS:554/[CHANNEL] | Yes | None |
RTSP(TCP) DVR | FFMPEG | rtsp://IPADDRESS:554//11 | Yes | None |
RTSP(TCP) DVR | JPEG | http://IPADDRESS/cgi-bin/net_jpeg.cgi?ch=[CHANNEL] | No | None |
RTSP(TCP) DVR | VLC | rtsp://IPADDRESS/[CHANNEL] | Possible | None |
works | FFMPEG | rtsp://IPADDRESS:554//11 | Yes | None |
Dahua | VLC | rtsp://IPADDRESS:554/cam/realmonitor?channel=[CHANNEL]&subtype=1 | Yes | None |
Vivotek | FFMPEG | rtsp://IPADDRESS:554/1/stream1 | Yes | None |
Vivotek | VLC | rtsp://IPADDRESS:554/live.sdp | Yes | None |
Hi3507 | FFMPEG | rtsp://IPADDRESS:554/1/stream1 | Yes | None |
Hi3507 | JPEG | http://IPADDRESS/cgi-bin/net_jpeg.cgi?ch=[CHANNEL] | No | None |
Foscam | JPEG | http://IPADDRESS/videostream .cgi?user=[USERNAME]&pwd=[PASSWORD] | No | None |
Note: URLs for VLC and FFMPEG need to have credentials (your ip camera login name and password) passed through in the URL like: rtsp://USERNAME:PASSWORD@IPADDRESS:PORT/. *Sources from iSpyconnect
* Onvif Device Manager/Viewer
Furthermore, you can install PC software to access/manage IP cameras from any PC. There are many free Onvif device manager/viewer software to achieve this.
5# Alarm & Email SMTP Setting
The IP camera supports motion detection, and other event detection. Once the camera detects these abnormal events, IP camera will send you email with snapshots. This is very useful, but to achieve this function, you have to config the SMTP server correctly.
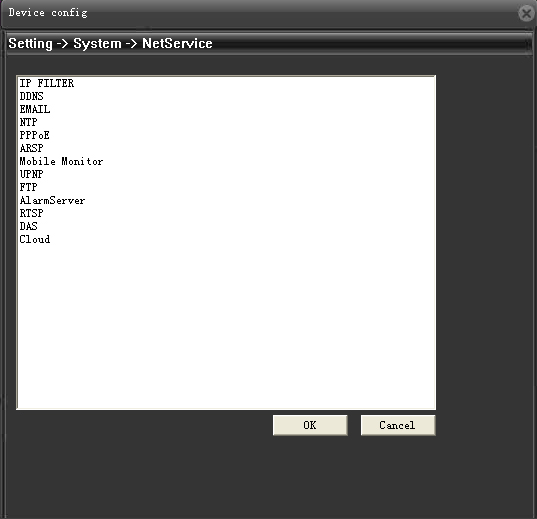
▲ Go to [Device Cfg] > [Setting] > [NetService] ▲
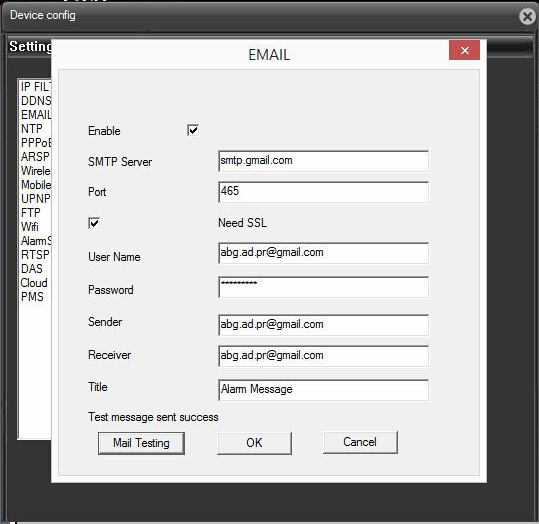
▲ Example of Gmail SMTP Setting ▲
- Gmail SMTP Configuration
- SMTP server (i.e., outgoing mail): smtp.gmail.com
- SMTP username: Your full Gmail or Google Apps email address (e.g. example@gmail.com or example@yourdomain.com)
- SMTP password: Your Gmail or Google Apps email password
- SMTP port: 465
- SMTP TLS/SSL required: yes
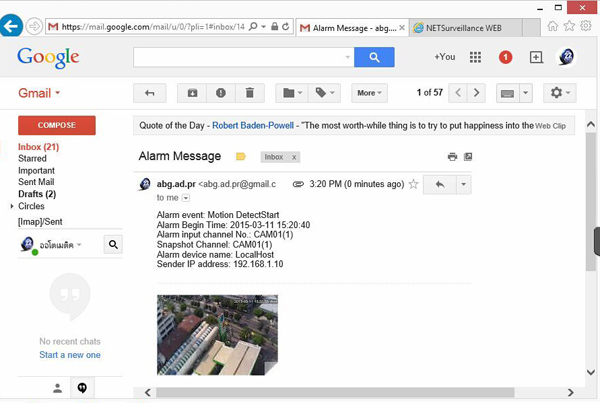
▲ Receive motion detection email with snapshot ▲
If the test failed, possibly the Google has blocked the sign-in, you need to check your Gmail box, you may receive an email about it. Here is the content from Gmail:
We recently blocked a sign-in attempt to your Google Account
If this wasn't you Please review your Account Activity page at https://security.google.com/settings/security/activity to see if anything looks suspicious. Whoever tried to sign in to your account knows your password; we recommend that you change it right away.
You can switch to an app made by Google such as Gmail to access your account (recommended) or change your settings at https://www.google.com/settings/security/lesssecureapps so that your account is no longer protected by modern security standards.
6# Remote view on Smartphone (Android & IOS)
Download the supported smartphone App from Google play, iTunes. Then, install them in your smartphone. If you use our IP cameras, the App name is: XMEye. The download link as below:
- Myeye for Android: http://xmeye.net/android/xmeye.apk
- Myeye for iOS: https://itunes.apple.com/en/app/id884006786
Simple tutorial for XMEye App
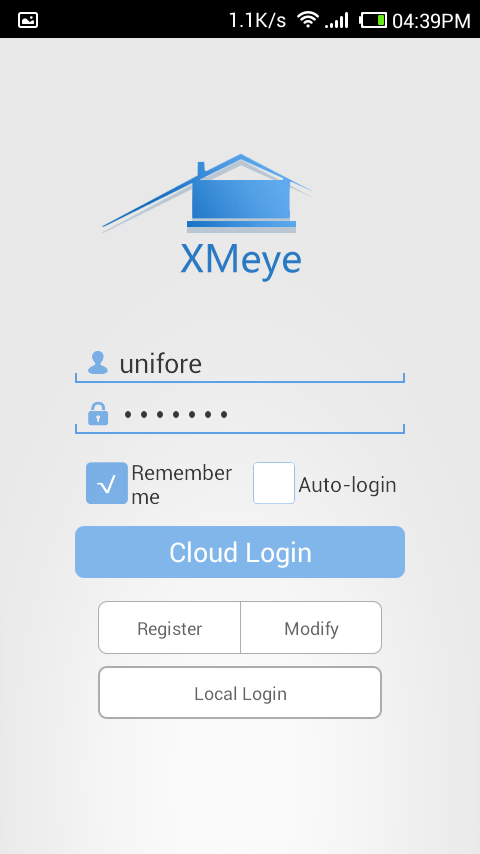
▲ Register an account, then login with new account info ▲
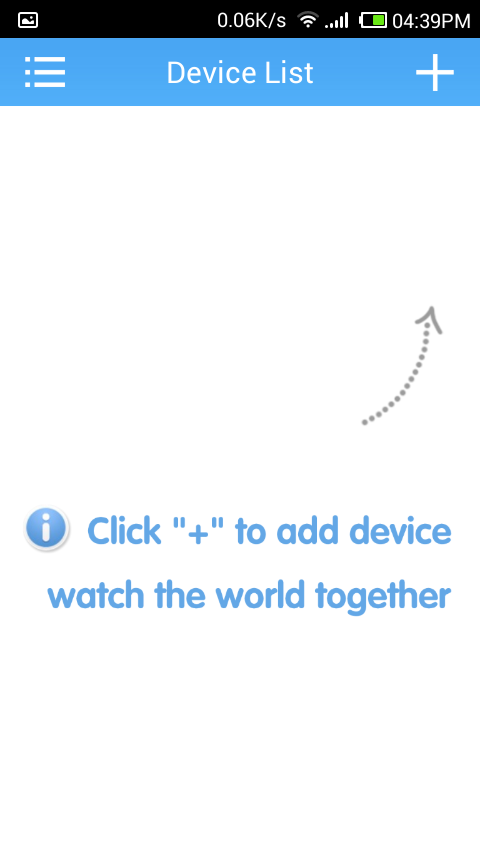
▲ Click "+" add new IP camera ▲
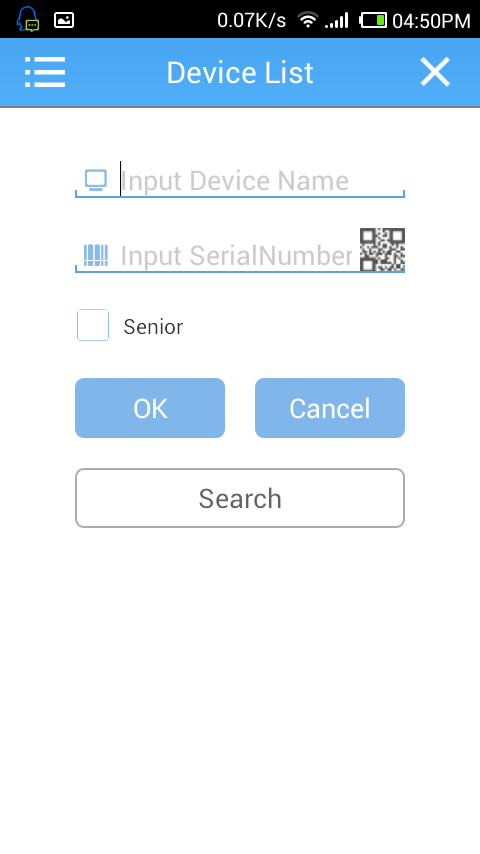
▲ Input Device Name (User defined), and Serial Number ▲
To find the IP camera's serial number, you need to use smartphone to scan QR code. QR code can be found on both camera body and IE web interface.
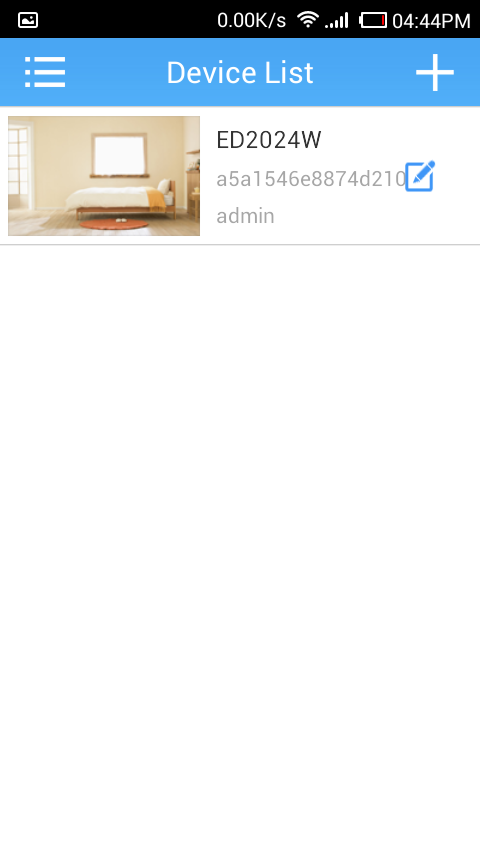
▲ Added IP cameras on XMEye ▲
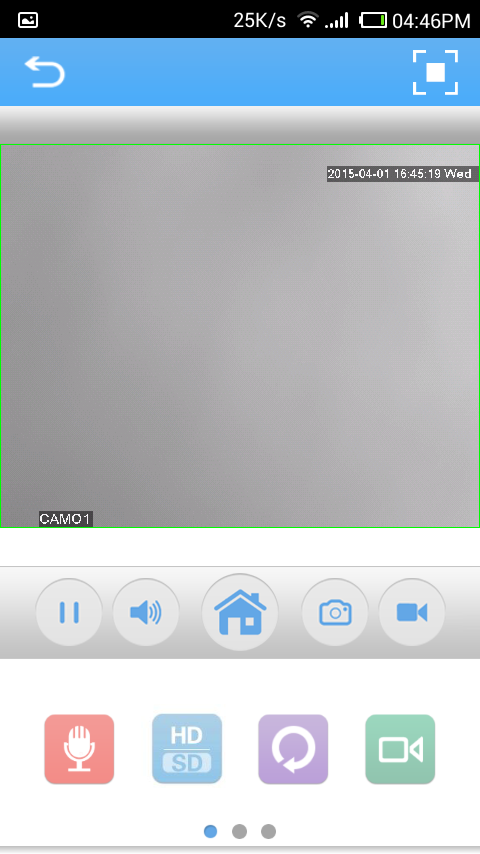
▲ Now you can access the IP camera by smartphone ▲