How to add Yoosee/CoT PRO Wi-Fi cameras to Blue Iris Software?
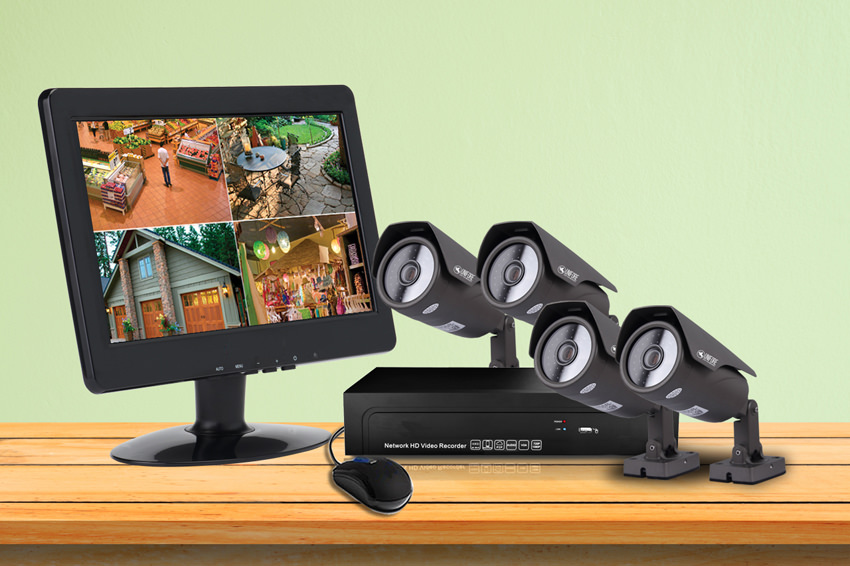
After some clients asked us whether our WiFi cameras were compatible with Blue Iris software, we decided to download and try this software. Blue Iris software is a paid video management software can manage multiple network cameras on the computer. The software offers 15 days trial use before purchasing the full version. The software has LE version which only supports a single camera and full version supports up to 64 cameras. The software has 32bit and 64bit version that can be compatible with Windows operating system, but no Mac version for Mac OS computers.
#1 Download/Install Blue Iris Software
Go to Blur Iris Software official webpage to download the software, then install it. Please check the below requirement for the OS and hardware. However, when I tested the software, it also worked on my 1.6GHz processor laptop computer.
Minimum requirements:
- Pentium dual-core or equivalent 2GHz processor or better
- 2GB or more system RAM
- Microsoft Windows XP SP3 or newer, or a server OS
- One or more USB or Network IP cameras, or an analog capture card with DirectShow drivers
Recommendations when using many and/or HD cameras:
- Intel core i7 with QuickSync for hardware decoding
- 8GB or more RAM
- Microsoft Windows 8.1 or 10, 64 bit
- nVIDIA graphics adapter for efficient screen display
- 7200+ RPM drives and/or SSD drive
#2 Knowing the IP address of camera
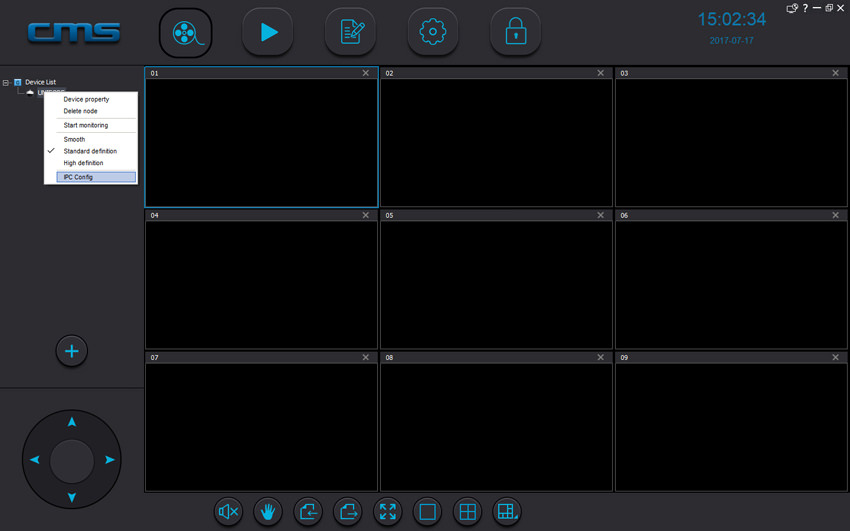
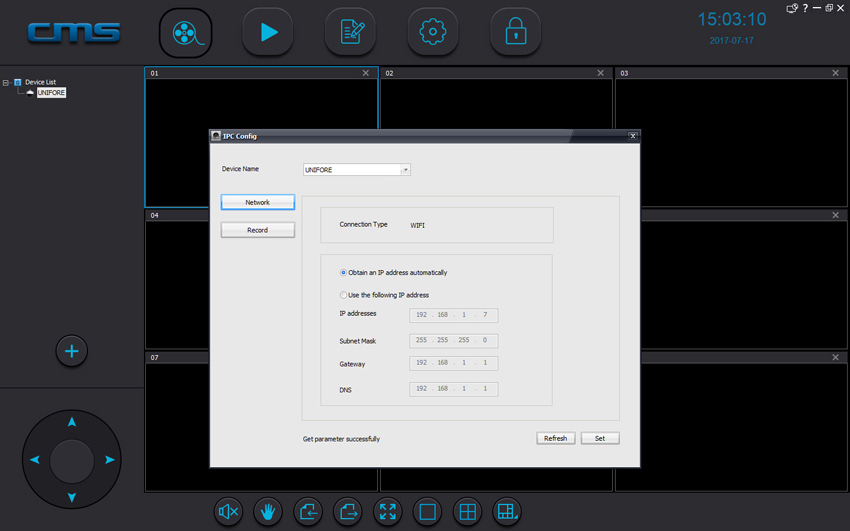
Adding the camera to the software is quite easy, but we should know the current IP address of the camera. To know the IP address of the camera, we can use the CMSClient software. Running the CMSClient software, then right click the mouse and select "IPC Config". The CMSClient will pop-up a dialog window, it shows you the current network information or you can manually change the setting.
#3 Adding the camera to the Blue Iris Software
The user interface of software is quite friendly and clear, after running the software, it reminds you to add the camera by clicking the "+" icon on the top corner of software. We click it, it pops-up a configuration window.
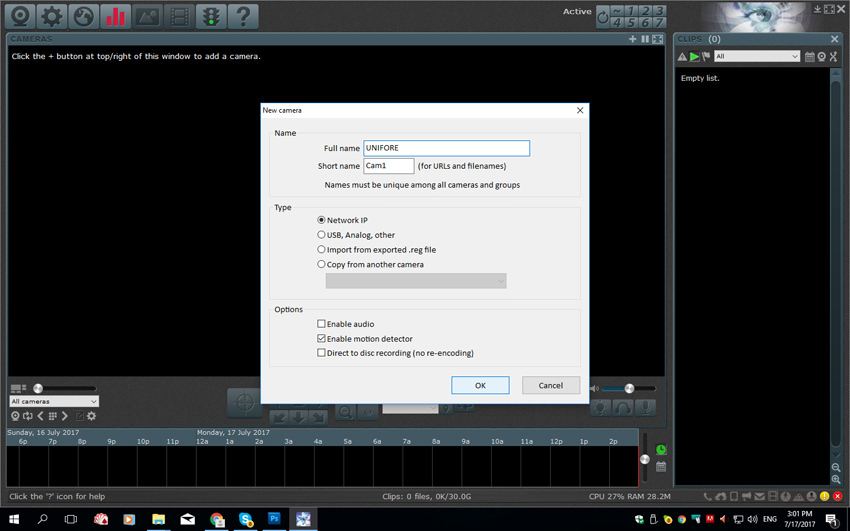
After we customize the name of the camera, we click "OK", we will be navigated to another page - Network IP camera configuration. On this page, we need to enter/modify camera's information including:
- Address: protocol + IP address of the camera, e.g. we select rtsp://, enter 192.168.1.7
- Account: user and password information, the default account of the Yoosee camera is admin, 123.
- Discovery/ONVIF port: the default port number of ONVIF protocol, e.g. 5000
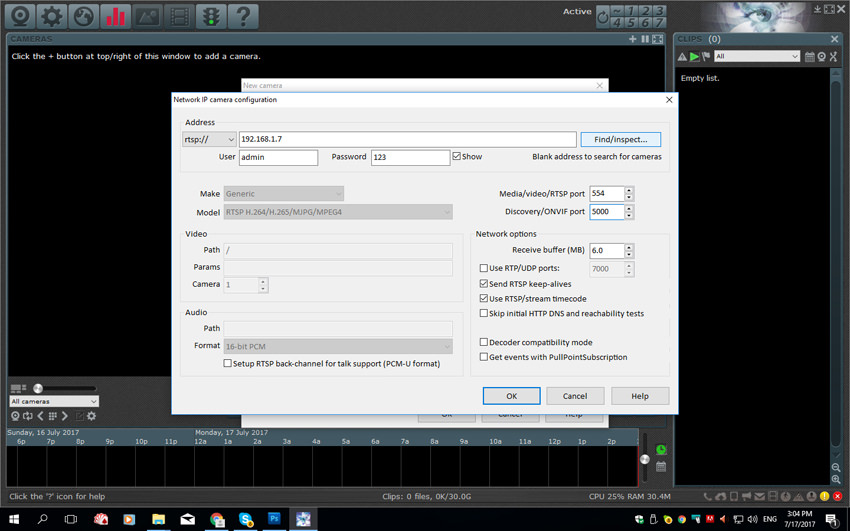
After we change the above mentioned information, we should also click "Find/Inspect", then the software will inspect the media information of the camera. For Yoosee/CoT PRO cameras, it will display the information as below:
Opening port 5000...
 ONVIF GetSystemDateAndTime
 Requesting device information...
 Manufacturer: Technology
 Model: IPC
 FirmwareVersion: 13.00.01.10
 GetCapabilities...
 Querying services
 Has media services: /onvif/device_service
 Has RTP_RTSP_TCP, requesting profiles
 first profile is IPCProfilesToken0
 first source is VideoSourceConfigSourceToken0
 requesting URI for profile IPCProfilesToken0
 RTSP URI: /onvif1
 Has Event services: /onvif/device_service
 Has WSPullPointSupport
 RelayOutputs: 0
 Has Device IO services: /onvif/device_service
 AudioOutputs: 0
 Has PTZ service: /onvif/device_service
 Done
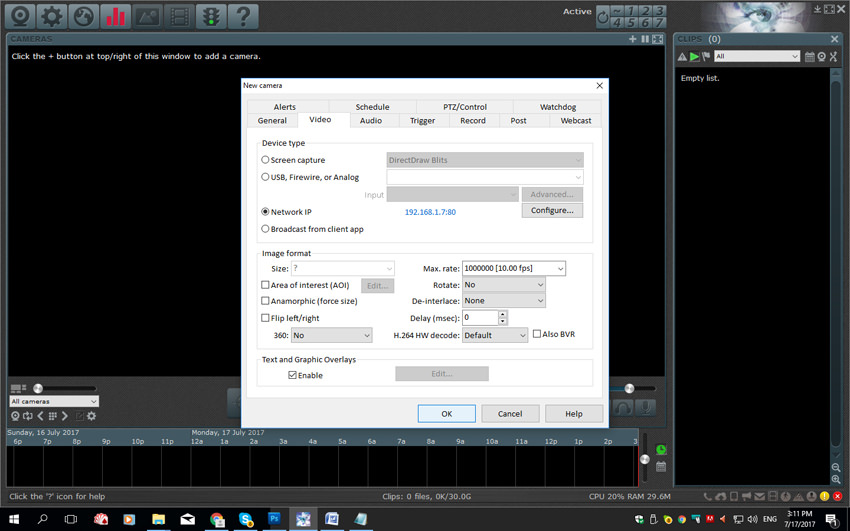
After we click "Close", the software will add "/onvif1" to the video path. We click OK, we will be navigated to an advanced configuration window, it allows users to tweak many advanced settings including Alerts (set motion detection and actions, it offers flexible actions e.g. sound an alarm using PC or camera speakers, send a push notification to mobile app, run a program or execute a script, request from a web service, send an SMS text message, send an email message, make a phone call with telephony modem, Set DIO bits 1+2+4+8), Schedule (set schedule for each cameras or profiles), PTZ/control (enable pan/tilt/zoom and other controls such as focus, brightness etc), Watchdog (detect loss of signal), Webcast (JPEG, MJPEG, H.264, web/mobile streaming), Post (post JPEGs), Record (record video when triggered, JPEG snapshot, create Alert list images when triggered), Trigger (Motion sensor, Global DIO inut bits, Camera's digital input or motion), Audio (audio channel from source including IPC stream, directshow camera, other directshow device)..
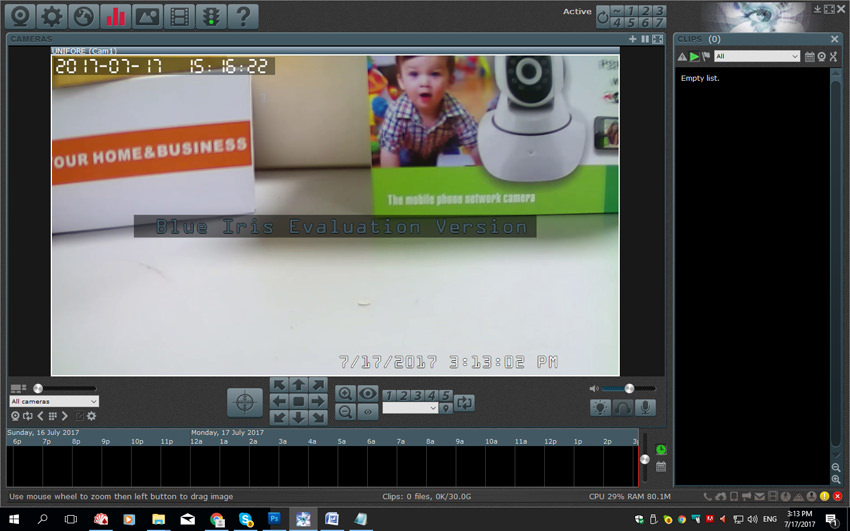
We keep other settings as the default, then click "OK" to complete the process. Now we are able to watch the HD video from Yoosee camera on Blue Iris software.
In conclusion, the software supports all the features that a professional NVR does. In addition to video monitoring, the software can support remote access. If you wanna access Blue Iris, you can do so from its web interface which works for all web browsers, you can not only view the cameras but also watch the recorded video footage. Technicians may like this software, because it offer many other advanced features, you can set the software to alert you by sound or email with video clips, record the session either continuously or just a clip, it also supports schedule recording and displaying, set motion detection and video loss detection, you even can set the software to make a phone call or send you SMS text message when any preset rule is triggered.
Get My Latest Posts
Subscribe to get the latest updates.
Your email address will never be shared with any 3rd parties.