
How to use 2CU eRobot smartphone App?
This is the simple tutorial which can guide you to use the 2CU eRobot smartphone App. This free APP has rich features to allow you protect and monitor your home. If you don't have this product, you may buy this IP camera from here. Let's begin from its introduction; 2CU is a free smartphone APP which is designed for eRobot IP camera, the new generation home IP camera system. eRobot uses advanced "Peer to Peer" network transmission technology, remote monitoring, video calling has never been easier, it's the best way to enage with your family and friends.
Get the latest version of eRobot 2CU App
For properly working and smooth usage, installing the latest version of this APP is mandatory. 2CU smartphone Android App is available in GooglePlay store, and IOS App is available in iTune. This App is free to download and usage. For your own privacy and safety, don't download/install the App from other sources.
Connecting the eRobot camera to network
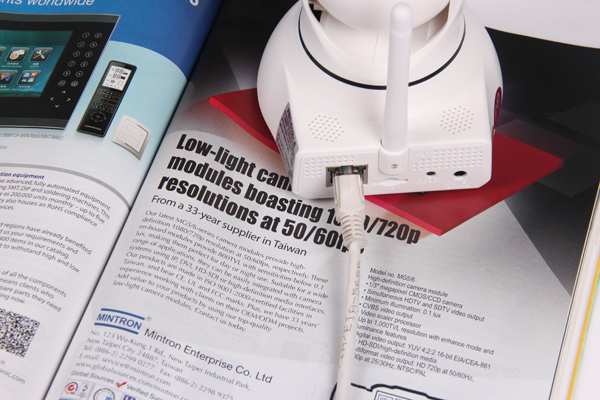
Using the Ethernet cable, plug your eRobot IP camera to Router, and also plug the included AC/DC adapter to electricity socket for turning on the system. Running the 2CU APP in your smartphone, then do next step. Most importantly, your smartphone must be connected into same Router, which means both devices (IP cameras and Smartphones or tablets) should in same LAN network. This can ensure the App find the equipment (eRobot Camera).
Registering an account, add a device
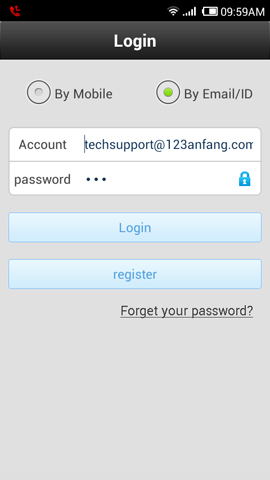
The 2CU APP provides two registering methods which are using mobile phone number or using your E-mail address. Go to login page, and click register, then input your email address and password, click "Register", then it's done, you will be navigated to "Device list"
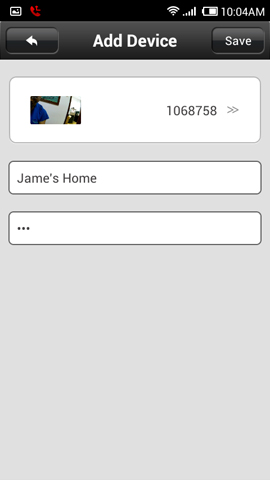
Adding new device (eRobot camera)
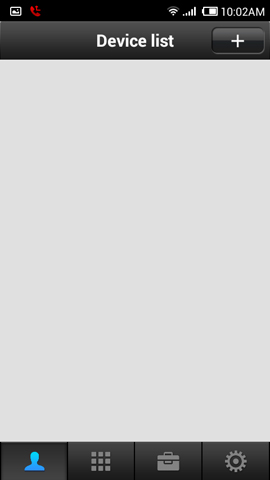
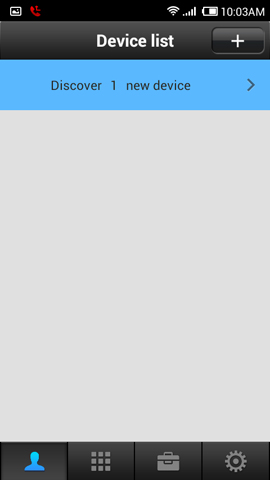
After enter into the "Device list", Waiting several seconds, the App will automatically search for available devices, then list them into your device list. Click "Discover 1 new device", then click "+" button, and input your own device name for example: Jame's home, and device password (default 123), click "Save", now you have successfully added a new eRobot to your smartphone App.
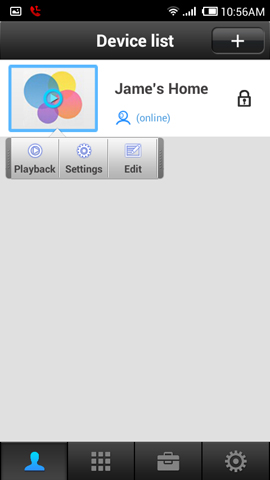
How to setup WiFi connection for eRobot?
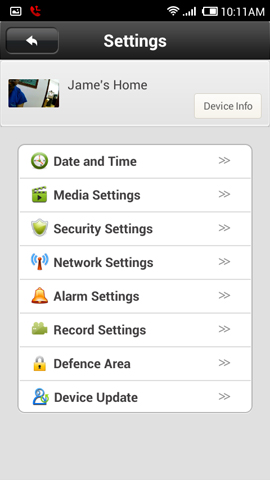
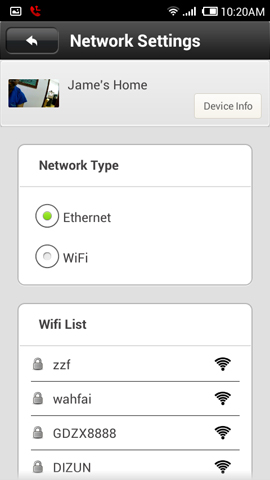
Click "Device name (i.e Jame's home), the camera's menu will pop-up, choosing "Settings", then choosing "Network Settings", you are able to switch between Ethernet or WiFi connection, it will also list the available WiFi list, click one of them, then input the WiFi password, your IP camera will disconnect from wired Ethernet, then using the WiFi connection.
How to enroll wireless sensors to eRobot camera?
Working with different types of detection sensors is one of main feature for eRobot camera. The eRobot camera is working with frequency of 433MHz wireless sensors. Not all wireless sensors are compatible with this camera, making sure get correct sensors before start to use this function.
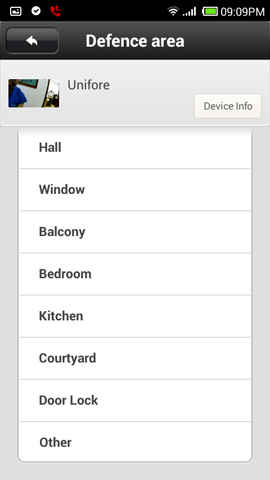
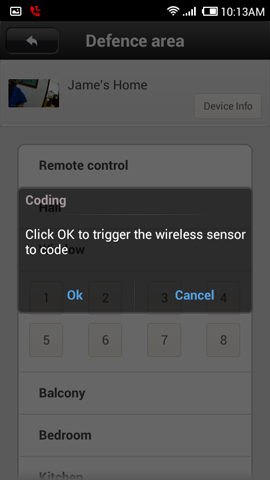
Click "Device name (i.e Jame's home), the camera's menu will pop-up, choosing "Settings", then choosing "Defence Area" in menu list, now you can see there are several names for your selection. These names are zone names, click the position you want to enroll the sensor, for the first piece sensor, click "1", then it will pop-up "Click OK to trigger the wireless sensor to code", now you need to turn on your sensor to be ready for enrollment. Click "Ok" on App, then triggering your wireless sensor for two times. When it shows "Code successfully", it means you have successfully added this sensor to this zone (eRobot camera). Note: In defence area list, "Remote control" is on the top of list, it's for enrollment of remote control (or remote keyfob, keychain).

Get My Latest Posts
Subscribe to get the latest updates.
Your email address will never be shared with any 3rd parties.
Tags: IP Camera, IP Camera Installation