IP Camera/NVR Interoperability: How to Use the ONVIF Device Test Tool?
No wonder ONVIF test tool is the best utility to allow you debug the ONVIF compatibility of your IP security devices. It help you to locate the communication/connection problem among NVRs, network cameras, even other network security systems for instance access control. It also can give you some insights especially when you face the interoperability issue for products from different suppliers.
ONVIF Test Tool is officially released by ONVIF organization, it’s a shared software for ONVIF members only.
{josociallocker} The Download link has been deleted. Because ONVIF Test Tool is not freeware for common users, so we can’t provide you the download link. However, you can use search engine to find some websites offer this software. Instead, ONVIF encourages you to use the another free utility - ONVIF Device Manager. {/josociallocker}
#1. Install the ONVIF Device Test Tool
Currently, you can find the ONVIF Device Test tool v16, v15, v14, v13, v12. In this tutorial we use Test_Tool_v13_06 version. To install and use this tool requires the .NET Framework installed in your computer.
#2. Use the ONVIF Device Test Tool
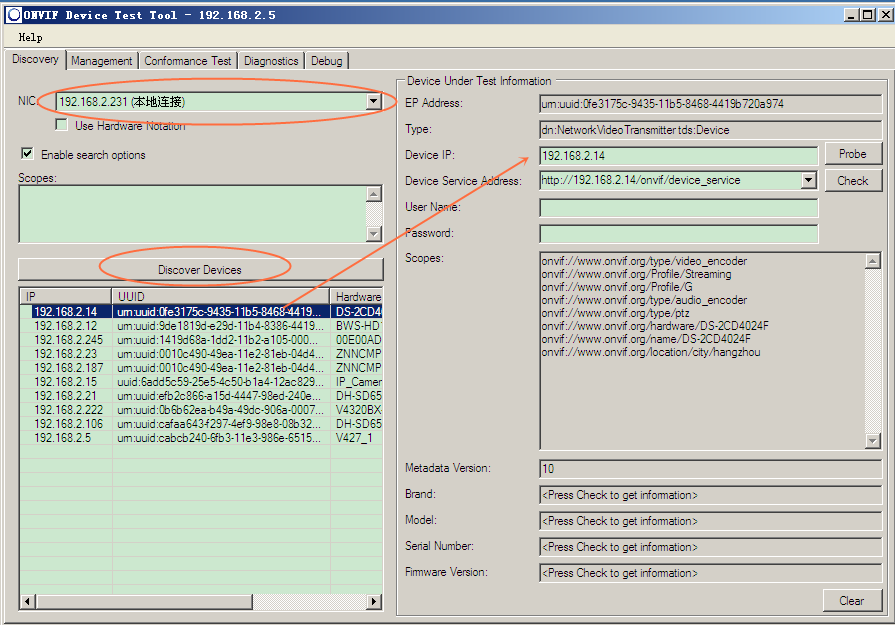
Running the software, choose the computer’s local IP address 192.168.2.231 (automatically listed), click “Discover Devices” button, the tool will automatically list the discovered IP devices in the same local network, the listed information including IP, UUID, Hardware name etc detailed info.
Selecting one from the discovered device, click “Check” button to read out the IP camera’s information, picture shows as below:

Click “Get” button, the software will read the video stream information from the IP camera.

In “Transport” option list, selecting most commonly used “RTP/RTSP/TCP” , then click “Play Video” to play the video feed.

Get My Latest Posts
Subscribe to get the latest updates.
Your email address will never be shared with any third party.